Monthly Archives: September 2013

How to update Fedora 19 on Marsboard A10

On my Marsboard I ran several times into the problem that when I started

yum update

after a reboot on finishing the update, my Marsboard wasn’t booting Fedora.

The problem was that the kernel packages were replaced with new ones, and the u-boot bootloader couldn’t cope with the situation. Probably the situation can be handled, but for now the safe way of updating the Fedora 19 on Marsboard A10 is

yum --exclude='kernel*' --exclude='uboot*' --exclude='arm-boot*' --exclude='dracut*' update

Why I do not advise to put the exclude directives in the yum.conf file? Because I tried it and the kernel became updated regardless of the exclude statements in the main section of the yum.conf file.

You can create a script named for example yumpudate.sh in your home directory, which you can use to save you the effort to write or copy/paste the whole command line.

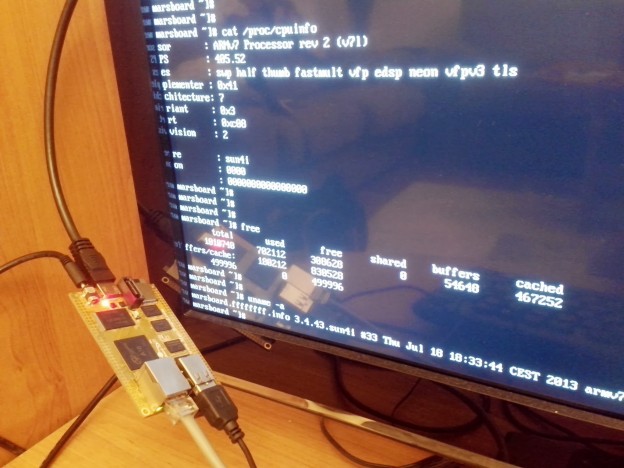
Fedora 19 running on Marsboard A10 on my TV

Running Fedora 19 on Marsboard A10

I recently purchased a Marsboard A10 development board from the Shenzhen based company HAOYU Electronics. The shipment to Bulgaria took less than 2 weeks via Hongkong post. On the Marsboard’s site there are some links to software, which can be used, a wiki page, and a forum about the board, however I had to successfully deal with some troubles when trying to use the solutions provided.

The board is advertised as being open, however not all issues about compilation and installation of software are clearly explained. Some images were not able to boot, the provided versions of the software were too old, e.g. Android version 4.0.4, Ubintu 12.06. The Linaro ubuntu distribution from the downloads page of Marsboard web site was running at very low frequency, with no change under heavy loads, probably due to poor bootloader configuration.

I noticed in this post that a Fedora 19 distribution for Cubieboard and other ARM boards was released. Cubieboard is very similar to Marsboard. I decided to try to adapt it to Marsboard A10.

As described in the  README file of the distribution, after the image is copied to an SD card, a script select-board.sh from the boot partition must be run, in order to install the u-boot bootloader and the boot configuration for the particular board:

cd ~/Downloads/Marsboard
wget http://scotland.proximity.on.ca/contrib-images/hansg/Fedora-19-a10-armhfp-r1.img.xz
wget http://scotland.proximity.on.ca/contrib-images/hansg/README-F19
xzcat Fedora-19-a10-armhfp-r1.img.xz >Fedora-19-a10-armhfp-r1.img

Now make sure the SD card on which you want to install the image has volume least 8 GB, that the SD card is inserted in the reader,  and that it is /dev/mmcblk0, now copy the image to the SD card

dd if=Fedora-19-a10-armhfp-r1.img of=/dev/mmcblk0 bs=4096 count=1926144
sync

The sync-ing flushes the cached information cached in memory to the physical medium. You may notice that it takes time, as a big part of the file was cached in the memory. After the sync command finishes, take out and re-insert the SD card. If you do this before the sync command has finished, the information saved on the SD card will become corrupt.

The problem was that the Marsboard board was not present in the list of the boards. I had to compile u-boot for Marsboard A10, accommodate the configurations for Marsboard, create a sub-directory for Marsboard under the boards/sun4i directory, and add the Marsboard profile in the select-board.sh script.

For each board with sun4i architecture there is a directory boards/sun4i/BOARDNICKNAME, where BOARDNICKNAME is the nickname of the board as defined in the select-board.sh script, used for identifying the board. There are u-boot.bin and sunxi-spl.bin files, which are part of u-boot, BOARDNICKNAME.fex file, with configuration parameters for the board, and a script.bin file, which is produced from BOARDNICKNAME.fex file using the fex2bin tool received from

mkdir -p ~/Downloads/Marsboard
git clone https://github.com/linux-sunxi/sunxi-tools
cd sunxi-tools
make clean
make
./fex2bin BOARDNICKNAME.fex >script.bin

So I’ll prepare a directory in which I’ll collect the files needed:

mkdir ~/Downloads/Marsboard/f19-boards-marsboard

Follow the instruction in the How to compile u-boot for Marsboard A10 article. After the compilation, copy the needed files in the prepared directory above:

cp u-boot.bin spl/sunxi-spl.bin ~/Downloads/Marsboard/f19-boards-marsboard

Now we need the marsboard.fex and script.bin files. From the marsboard-android-4.0.4-sdk.7z archive we can find the .fex file, as this post suggests.

cd ~/Downloads/Marsboard
wget http://www.haoyuelectronics.com/marsboard/marsboard-android-4.0.4-sdk.7z
7z l marsboard-android-4.0.4-sdk.7z
7z x marsboard-android-4.0.4-sdk.7z
find marsboard-android-4.0.4-sdk -name '*.fex'

There are 2 files which can be the corect files:

./marsboard-android-4.0.4-sdk/tools/pack/chips/sun4i/configs/crane/marsboard/sys_config1.fex
./marsboard-android-4.0.4-sdk/tools/pack/chips/sun4i/configs/crane/marsboard/sys_config.fex

By comparison of the files with the *.fex files from the uboot partition of the Fedora 19 image, e.g. we can find that sys_config1.fex is the correct *.fex file to copy to the board directory.

cp ./marsboard-android-4.0.4-sdk/tools/pack/chips/sun4i/configs/crane/marsboard/sys_config1.fex ./f19-boards-marsboard/marsboard.fex

Now translate the fex file to script.bin:

./sunxi-tools/fex2bin ./f19-boards-marsboard/marsboard.fex >./f19-boards-marsboard/script.bin

Remember that we left the SD card with the Fedora 19 image re-inserted, and the 1 and 3 partitions, labelled uboot and rootfs are mounted automatically to /run/media/$USERNAME/uboot and /run/media/$USERNAME/rootfs, where $USERNAME is the environment variable, which contains your username. Now copy the f19-boards-marsboard to the sun4i directory:

cp -R ./f19-boards-marsboard /run/media/$USERNAME/uboot/boards/sun4i/marsboard

Now what is left is to add marsboard in the select-board.sh script. This happens with only one line, marked below with ‘+’ to show the difference:

 BOARDS+=(wobo-i5             "Wobo i5 TV Box")
 BOARDS+=(xzpad700            "XZPAD700 7\" tablet")
+BOARDS+=(marsboard           "Marsboard A10")

 if [ "$1" = "--help" -o -z "$DIALOG" -a -z "$BOARD" ]; then
     echo "Usage: \"$0 <board>\""

In the real select-board.sh the + in the start of the line should not exist. Now sync the changes and umount the filesystems from the SD card:

sync
umount /run/media/$USERNAME/uboot /run/media/$USERNAME/rootfs

Now you can unplug the SD card from the card reader, plug it in the Marsboard, and enjoy your Fedora 19 installation.
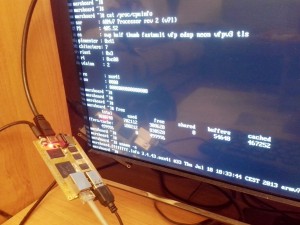
Fedora 19 running on Marsboard A10 on my TV

Fedora 19 running on Marsboard A10 on my TV

You can find an archive with the files produced here: Fedora 19 on Marsboard A10 bootfiles
How to compile u-boot for Marsboard A10

The next instruction is for cross-compiling the u-boot bootloader for Marsboard A10 on Fedora 19 x86_64. With little modifications it should be able to work with other versions of Fedora, and to compile u-boot for another ARM board, e.g. Marsboard A20, ot Cubieboard.

Make sure the arm-linux-gnu toolchain is installed

yum install gcc-arm-linux-gnu binutils-arm-linux-gnu

My exact versions of those 2 packages are

# rpm -qa | grep arm-linux
gcc-arm-linux-gnu-4.7.2-2.aa.20121114svn.fc19.1.x86_64
binutils-arm-linux-gnu-2.23.51.0.3-1.fc19.x86_64

Please note that I tried the arm-none-eabi toolchain, but I encountered a problem during the cross-compilation. The cross-compilation was failing with segmentation fault, so I switched to arm-linux-gnu toolchain.

The command line of the instruction from the wiki How to compile the Allwinner A10 u-boot

git clone git://github.com/hno/uboot-allwinner.git

is not working, as the uboot-allwinner repository was removed.
I found that in the main u-boot repository there was a recent addition of Marsboard A20. The Marsboard A10 configuration for u-boot was present too. So I cloned the repository locally:

mkdir -p ~/Downloads/Marsboard
cd ~/Downloads/Marsboard
git clone git://github.com/hno/u-boot.git
cd u-boot

According to the README file in the u-boot root directory, after I found that the name of the board is Marsboard_A10 in the u-boot configuration lists, the next instructions had to compile u-boot:

export CROSS_COMPILE=arm-linux-gnu-
make Marsboard_A10_config
make clean
make

Don’t forget the trailing dash ‘‘ of the arm-linux-gnu- string which is put into the CROSS_COMPILE variable.

If everything compiled fine, you’ll have the u-boot.bin file in the root of the u-boot tree, and sunxi-spl.bin in the spl/ directory.

How to change Firefox encoding

In Firefox 23, go to the main menu -> View -> Character Encoding, and choose the encoding which you need.

I must say however that the cases, in which I have to use this option nowadays, are extremely rare. This is thanks to the wide use of Unicode, which replaces 8-bit the characters with 16-bit, thus making unnecessary the unreliable language detection.

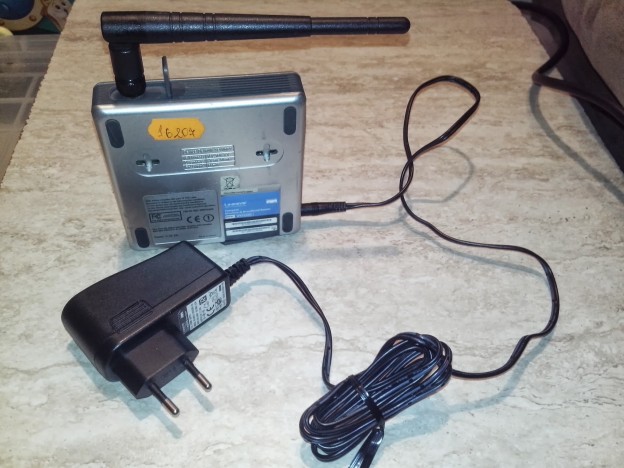
WRT54GC with its power supply

How to repair faulty WRT54GC power supply adapter

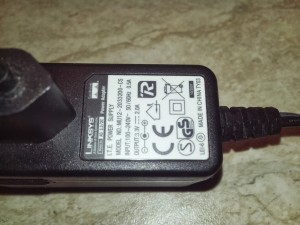
WRT54GC power supply label

WRT54GC power supply label. A good reason to repair the power supply is that 3.3V 2A adapter is difficult to find.

WARNING: Mishandling the repair of any power unit can lead to electric shock or fire, which can kill you or somebody else, or produce damage. Do not attempt this repair unless you are qualified for the task.

Now that you have been warned I can continue with the rest.

I’ve had a total 4 cases of failure of power supply adapters of Linksys WRT54GC routers for 4.5 years for 2 such routers. The first three failures were covered by the warranty, so what I had to do was just take the failed power adapters together with the routers to the service company. They replaced the faulty power units with working ones.

The last failure happened several months ago. I found the router had a trend to hang more and more frequently. The power unit was getting extremely hot and the WRT54GC router which was powered by it was failing. I had handy a unit from another WRT54GC router, so I tested the router with it. It was clear that it was the next power unit failure in the series. It seems to me that the power units were either misdesigned, or low grade components were used.

I saw that the warranty has expired. I had had quite good experience with various electronic devices, so I decided to repair the faulty WRT54GC power unit myself. The unit was sealed either by glue or by melting at high temperature, so I had to cut the line where the front and the back parts of the case join, using a thin saw, and then eventually with a cutter blade. Knowing that I can damage any internal parts I was extremely careful doing that operation.

I split the front from the back of the power unit. I carefully discharged all the capacitors, just in case they had remained charged. After all, the inut circuit was powered by AC about 220 V and I didn’t want to get hurt. After that I started to inspect the circuit.

As I could imagine, at least one of the electrolyte capacitors had failed. It had become swollen. Using a solder and a desoldering pump, I removed it and replaced it with a higher grade capacitor with slightly higher maximum voltage and the same capacity. It was a bit bigger but it fit into the footprint of the case.

I closed the case and fastened it with PVC band. I could alternatively seal the case using a solder to melt the plastic where the edges join together. The good attachment is extremely important in environments where children can reach the power adapter. My power unit is put of the reach of children, it remained fastened with PVC band.

I tested the power supply. The router was working just fine. The power unit was not too hot, so I did not need to use alternative means of attachment or to make holes in order to improve heat dissipation.

I am sorry I did not take photos during the repair works, but  I hope the verbal description of the task was a sufficient tip on how to repair the power unit and enjoy more years with your WRT54GC. 🙂

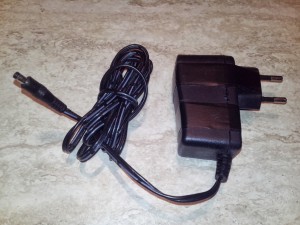
The repaired WRT54GC power supply

The repaired WRT54GC power supply

Regards,
Nikolay